Artistic Advent Calendar to be auctioned on eBay for Oxfam

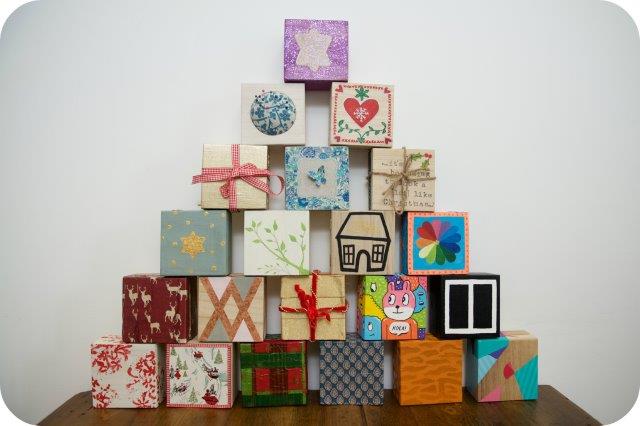
box4This Christmas I’ve joined forces with Parcel Hero and Oxfam to create a truly unique Advent Calendar to be auctioned on eBay.

International Courier company Parcel Hero contacted myself and 24 other well-known craftsmen and women to ask if we would donate our time and skills to create an amazing advent calendar which would be auctioned to raise money for Oxfam. It sounded like such a fun and worthy project that I jumped at the opportunity to get involved.

In October Parcel Hero sent out 25 plain wooden boxes to artists across the globe with one simple brief… ‘turn them into something spectacular!’

So what happened to my box…

boxThe Outside

The outside was painted using some of my favourite colours and motifs (look at my logo to see what I mean). I think twisted leaves set on a cream background is such a restful image and I wanted to share that with the lucky recipient. The painting was then waxed.

The Inside

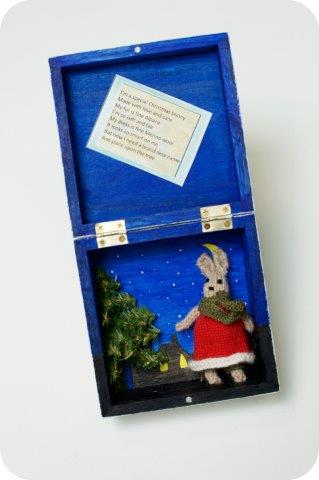
In complete colour contrast (I like to keep people guessing) I painted the inside with deep colours to look like a simple silhouetted street. Dark skies and lights in windows all conjure up images of the season and I loved how deep and soporific an image they create.box2

I also wanted to add a 3d element to the scene so created a Fir Tree made from pipe cleaners.

The Poem

In the lid I wrote a poem to explain the gift inside:

‘I’m a special Christmas bunny

Made with love and care

My fur is fine Alpaca

I’m so soft and fair

My dress is fine Merino wool

It looks so smart on me

But now I need a brand new name

And place upon the tree’

box5The Gift

The poem may have given you a clue. The gift was a small (and I mean teeny) rabbit I knitted who can be hung upon the Christmas tree. She was made from the finest Alpaca wool (it’s so soft!) then clothed in a hand-knitted Merino wool dress complete with bloomers and a scarf. I hope she will be loved by her new family and grace the tree for many years.box3

Of course this box was just my contribution and with 24 more boxes from the likes of Matt Jones of Lunartik, Jenny Barnett Rohrs of Craft Test Dummies, Hilary Pullen of UK Craft Blog and Pablo Lentile there’s definitely something to delight everyone!

Oxfam’s partnerships manager Peter Hall commented: “Oxfam gives a massive thankyou to every artist who has taken part. These advent boxes will help change lives. We are so impressed with the amount of effort and creativity that has gone into these creations. Let’s hope they raise loads of funds to help Oxfam end poverty sooner! Happy bidding!”

Parcel Hero’s head of PR David Jinks, added: “This is probably the most unique and inspired advent calendar ever created; but sadly only one person can own it.”

If by now you’re wondering just how you can get your hands on this wondrous creation, then head on over to eBay here and bid bid bid. The auction closes on 26th November and all money raised will go directly to Oxfam.



Crochet Phone Case Pattern tutorial

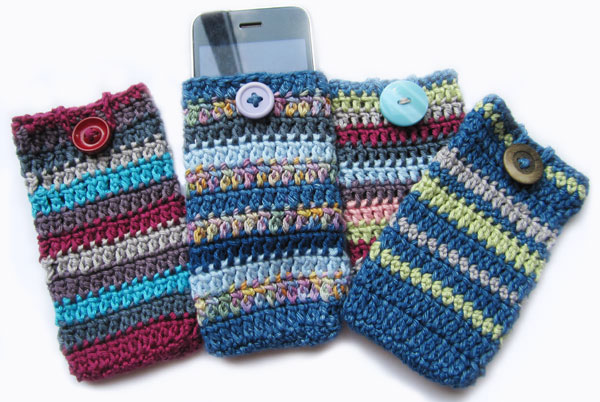
phone-casesCrochet and knitting have been experiencing a fashionable revival in recent years, there’s even been quite a few celebrities getting in on the fun. Whether you are an avid Knitter, Crocheter or general Hobbyist, then chances are you have a stash of threads/wool left over from previous projects. But there’s no need to consign them to the rubbish bin, with todays Crochet phone case pattern.

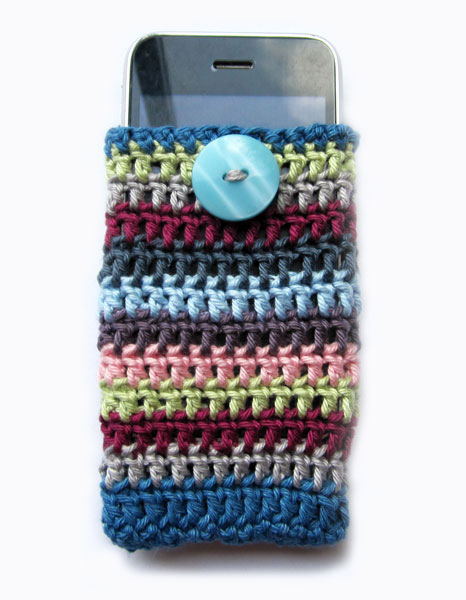
I actually wrote this pattern several years ago for the Boden Community  but I think it would make a great homemade present so thought I’d share it again today.phone-in-case

We all seem to live our lives through our mobile phones and Crocheted phone cases are not only pretty, they’re practical too! First they help to protect your screen, second they don’t muffle the ringing tone as solid cases can.

What You’ll Need

Left over DK Wool or DK Cotton yarn

A Mobile Phone

3.5mm Crochet Needlechain

To Begin

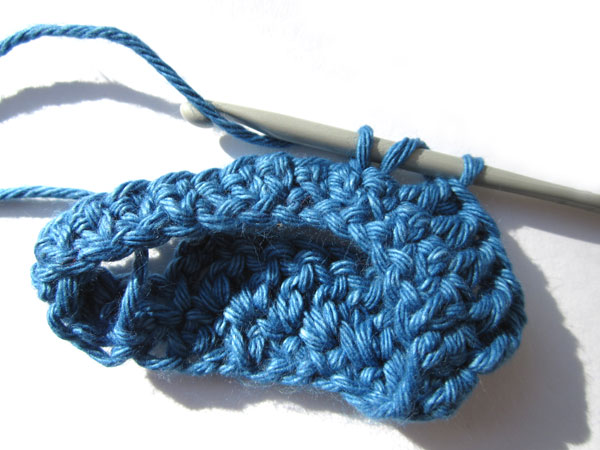
Begin by making a chain long enough to go right around your phone. Mine was 26 chains and then use a slip stitch to join into a ring.First-colour


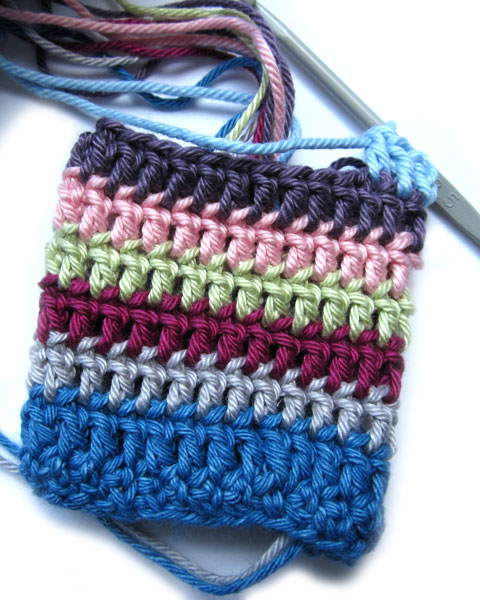
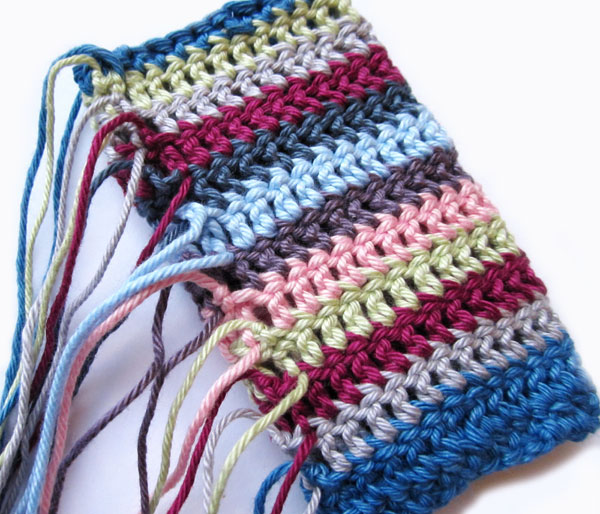
Round 1ch 1, 25 dc, (this is one dc into every chain stitch), then sl st into first chain to close up the circle. Round 2ch 3 and then work 1 tr into each stitch until you have completed the circle and then join with a sl st. Round 3Join second colour into top of any tr st from last round, ch 3 and the work 1 tr into each stitch until you have completed the circle and then join with a sl st. Rounds 4 – 13. Join in new colours , ch 3 and then work 1 tr into each stitch until you have completed the circle and then join with a sl st. You may need to adjust the amount of rounds you complete here depending on the size of your phone.strips


Last Round 

ch 1, dc into each stitch of the last round and join with a sl st.

endsSewing Up

To sew up, turn your phone case inside out and use a large needle to weave in all the loose ends. To close the bottom of the case, sew along the edge with an over sewing stitch.

Once all ends are sewn in, turn the case the right way out. To close, sew on a button and then join the yarn to the top edge and make enough chain stitches to be fit over the button.

Mine was 18 chain stitches. Finally weave in these ends and place your phone in its smart new case. Here are some more examples of cases I have made.


ABBREVIATIONS:

ch: chain dc: double crochet sl st: slip stitch tr: treble crochet


Make your own Ice Skating Snowman Theatre

icetheatreThere’s snow doubt about it Winter is coming! *Excuse me while I laugh heartily at my multiple clichés and puns :D* The nights are drawing in and the weather is super nippy so why not cosy up and get crafty with the kids. Today’s tutorial to make your own ice skating Snowman theatre is a fun way to embrace the season while keeping warm! It was made using materials provided by Bostik as part of their Craft Ambassador program.

Full instructions to make the theatre are included in this video but I’ll also pop text instructions below.

What You’ll Need

Bostik Blu Tack Foam Pads

Bostik Micro Dots

Bostik White Glu

A cardboard box

Foam or paper to decorate the sides

Blue card

Tracing Paper

Foam

Snow themed stickers

Fluffy Balls (or pom poms)

Polystyrene Star

Glitter

Lolly sticks

Thread

Tape


Step 1

Start with a cardboard box, stick back 3 flaps with tape, leave one flap open.

Step 2

Decorate the sides & back using foam (or paper) stick into place using the Bostik Foam Pads.

Step 3

To make the frozen lake (ice-rink) use a blue sheet of cardboard with a piece of tracing paper laid on top. Cut shapes out of foam to make the edge of the lake, add white foam on top to represent the snow. Stick into place using Bostik Micro Dots or White Glu.

Using Foam pads stick the ice-rink to the open flap of the box

Step 4

Cut a slit into the back of the box, then decorate the interior using stickers. To add further decoration I stuck fluffy balls (snow balls) to the scene using foam pads.

Step 5

Cover a polystyrene star with Bostik White Glu, then sprinkle over glitter. Once dry stick to the back of your scene using foam pads.

Step 6

Now to make the snowmen. Stick fluffy balls (or pom poms) on top of each other and then stick to a lolly stick.

Step 7

Tie thread around some sparkly pom poms and stick to the top of the theatre using foam pads.

Finally paint the outside of the box, slide your snowmen through the gap at the back and you’re ready to play!