Hello dear readers,
I’m in a very good mood today after finding out yesterday that our little blog has been nominated for an award! If you love us as much as we love you please vote by clicking here
So to celebrate I’ve decided to share a Button Necklace Tutorial with you all, if you’ve ever met us at a fair you might recognise these from one of our small kits. So if you like buttons old and new and have always wondered what else you can do with them have a go with these instructions which were penned by the other half of Angel Eden ‘Anne’.
Button Necklace
You will need
Two lengths of waxed cotton about 90 cms long, (looks good if they are two different colours), small enough to go through the holes of your buttons.
About 19 buttons, can be 2 or 4 hole, except the button for the fastening which needs to be four hole.
All Purpose strong clear glue.
Instructions
- Hold the two strands of waxed cotton at one end and fold them over and knot to make a loop. This loop will be the fastener going over the end button of the necklace, so its important to make sure it is the right size for your button to go through. Once you are happy with the size pull as tightly as you can.
2. The buttons are now going to be strung individually on each strand, divide them in half and decide on the colour order. One button will be used to make the end button to fasten the necklace.
3. Start threading buttons onto one of the strands of waxed cotton by passing the thread from behind through one of the holes of the first button and then pass back through the opposite hole. Now leave a space of about 5 centimetres before placing the next button in the same way. Continue until you have achieved the length you want or half the buttons are used.
4. With the second strand put the buttons on in the same way but place the first one so that it lays half way between the first two buttons on the first strand. Continue until all buttons are placed making sure each button on the second strand sits between two on the first.
5. With the last button use both threads to go through it from the back and cross threads diagonally to form a cross and pass thread back through the other two holes. Tie the two threads in a reef knot behind the button. This means to pass the right thread over the left and then pass under it, then pass the left thread over the right and pass under. Pull this knot as tight as you can.
6. The ends can now be cut and some appropriate clear glue put on the knots at each end of the necklace to make it extra secure.
This necklace can be made with a variety of buttons, they do not need to all be the same size. The two strands could also be two different lengths to make a different design. It really does look attractive when worn but is more difficult to do justice to in a photograph. Depending on the colour and size of buttons used, it can make a very individual present for both adults and children.
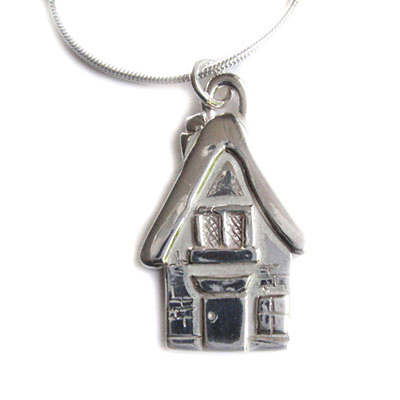
 I am very happy to announce our brand new competition today. We are giving away one of our gorgeous handmade silver thatched cottage pendants!


7 Comments (Leave a comment)