Gluten Free Banana Loaf Recipe.

I’ve recently decided to put my diet under the micropscope and make some changes to try and improve my health. As wheat free diets seem to be ‘in vogue’ it seemed like a reasonable place to start, however it presented me with one very big problem….. cakes! Now I appreciate that a health kick and cakes and biscuits for that matter might seem contradictory, but I am looking for a lifestyle change not a quick fix. So I think it would be unreasonable to expect I might not want the odd treat. So with this in mind I hunted out a wheat and gluten free cake recipe and I’m very pleased with the results. I thought I would share this recipe if any of you fancy giving it a go. I’ve also taste tested it with Abi and her son and there were smiles all round, so it gets a big thumbs up from all of us here.

From this

To this

Gluten Free Banana Loaf

Ingredients

110g/4oz sultanas

110g/4oz butter, softened

110g/4oz caster sugar

2 large eggs, preferably free range

3 large ripe bananas

175g/6oz fine rice flour

50g/2oz cornflour

2 tsp gluten-free baking power

1/2 tsp salt

1kg/2lb loaf tin, lined with baking parchment

Method

1.Preheat the oven 180C/350F/Gas 4

2.Cream the butter and sugar together until pale, light and soft. Add the eggs, one by one, and beat well.

3.Mash the bananas and add to the creamed mixture.

4.Sift the rice flour, cornflour, baking power, and salt together and fold carefully into the banana mixture. Very gently stir in the sultanas.

5.Put the mixture into the greased & lined loaf tin and bake in the oven for about 1 1/4 – 1 1/2 hours until golden on top and a skewer inserted into the middle comes out clean.

6.Remove the loaf from the tin and cool on a wire rack.
A Little Less Silver & A Little More Sugar

We’ve had a change of pace here at Angel Eden, we downed the jewellery tools and reached for the rolling pin. With a party fast approaching we were thrown into full throttle preparation and I thought it would be a lovely idea to share some of our discoveries with you all.

Of course there was the obligatory cake, with a woodland theme we decided a mushroom shaped cake was really the thing required.

This was made from a medeira cake spread with buttercream and then covered in fondant icing.

One tip I have here is the buttercream, if like me you thought buttercream always consisted of just icing sugar and butter, then you’d be wrong. The buttercream here is the best I’ve ever made, here’s the recipe:

4oz Butter

12oz icing sugar

1 tbsp milk (yes milk!)

it gives the perfect consistency and tastes delicious!

After the cake came biscuits. I’ve always loved the idea of beautiful biscuits, but icing always runs, or stays too tacky leaving it fragile and easily squashed. I looked to the internet and discovered run sugar. This is essentially royal icing but with more water. It therefore dries hard and is very easy to work with. The recipe came from america and includes an item called meringue powder, if you’ve never heard of this it’s wonderful stuff. Thankfully my local cake shop sold it, but it is also widely available to order online. Let us know if you try any of these ideas out and have fun!

Here’s the recipe:

1 lb + small 1/4 cup icing sugar

5 Tbsp meringue powder

1/2 cup cool water

A few drops of paste food coloring

The results:

Recipe Time – Home Roasted Pumpkin & Pumpkin Pie!

As I am from the UK Pumpkin Pie is not something I’ve come across regularly. Thankfully I was introduced to it last year by a family friend and can’t believe I missed out on something so yummy for so long! Unfortunately tinned pumpkin is not as readily available in the UK as it is in the US. So I was left with no other option than to start making Pumpkin purée from scratch.

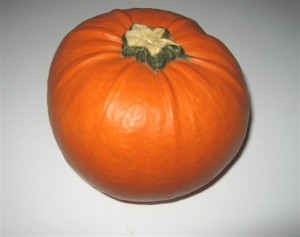
Sainsburys is currently selling small cooking pumpkins. They have a wonderful flavour and are perfect for this festive pie. Although in a pinch you can use a carving pumpkin, they just don’t have as much flavour.

How to Roast and Purée a Pumkin

Start by chopping the pumpkin in two and dig out all the seeds and pith. Coat both sides of the pumpkin with vegetable oil and place cut side down into a roasting tin and top with water.

Turn the oven on to 200C and bake for 60-90 minutes. They are ready when you can press a fork into the side of the pumpkin with ease.

Now grab a spoon or ice cream scoop and remove all the flesh from the insides. Use a blender to blitz the pumpkin flesh into a purée.

Place a sieve over a large mixing bowl and line with a couple of sheets of kitchen roll. Pour in the puréed pumkin and leave to drain for 2-3 hours.

Pumpkin Pie

Make up a simple shortcrust pastry and line two regular sized pie dishes.

In a clean bowl mix together:

1 cup granulated sugar

1.5 teaspoon ground cinnamon

1 teaspoon ground cloves

1 teaspoon ground allspice

1/2 teaspoon ground ginger

1/2 teaspoon salt (optional, I don’t use any)

3 cups pumpkin purée

1 can evaporated milk

4 Eggs

I used a balloon whisk to get the mixture nice and frothy. Pour into your prepared pie dishes.

Bake at 210C for 15mins, then turn the oven down to 175C and cook for a further 40-50 mins. It is cooked when a sharp knife pressed in comes out clean.