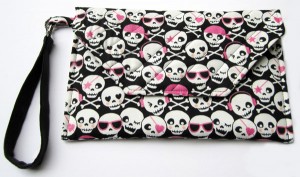
 A little while ago I fell in love with a gorgeous Japanese print fabric. But when I enquired at the store they only had fat quarters left and none on the roll. Unable to resist the print, I bought it anyway. Aside from quilting there is one project that fat quarters are perfect for and that’s making Clutch Bags! I loved my new bag so much I decided to share this tutorial with you all. Incidentally it took far less than a fat quarter to complete (as I lined in a plain black fabric) so I now have a make up bag as well (two bags out of one piece of fabric is not bad going 🙂 ).
What You’ll Need
Fat Quarter of gorgeous fabric
Lining fabric (unless you are also lining with your fat quarter)
Wadding
Thread
Velcro or Poppers
Metal Handbag Clip
 Step 1
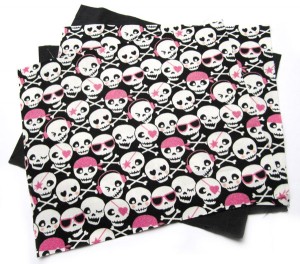
Lay out your fat quarter and cut 2 pieces sized 29cm x 18 cm, one for the back and one for the front. Then cut a piece 29cm x 13cm for the front flap. You could have a completely square flap, but if you’d like to add a bit more shape cut off two corners on one of the longer sides. Tip. It’s easiest if you fold the flap piece in half and cut the two corners off in one go. With the remaining fabric cut a small piece 13cm x 4cm to make the loop needed to attach the wrist strap.
Step 2
We’ll start with the easiest piece, the small loop for the wrist strap. Fold the small rectangle in half (right sides of fabric on the outside). Iron and then fold the sides into the middle again. Iron and edge stitch along the folded edges. Fold in half ready to be sewn into the bag later on.
 Step 3
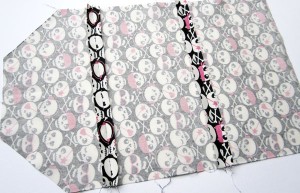
Sew the front and back bag pieces together on the wrong side of the fabric and along the longest lengths to make a long rectangle. Then attach the flap piece to one of the rectangles, making sure the two cut off corners are at one end.
Iron the seams open and use this piece as a pattern for cutting out the lining fabric and wadding.
Step 4
Lay the three pieces on top of each other. The lining and main fabric are right sides together and then the wadding is placed on top. Now pick up the loop you made earlier and tuck it inside the three pieces of fabric so that only the ends are protruding. This needs to be placed at the top edge of the middle piece of the outside fabric.
 Step 5
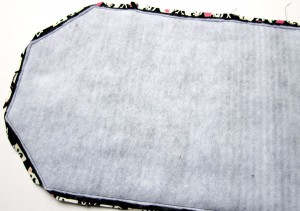
Pin and sew all the way around the edge, making sure to leave a 3cm gap on the shorter straight edge, this enables the bag to be turned the right way out. Trim the edge of the wadding back to the stitching. Trim all the corners to make turning easier, but make sure you don’t cut through your stitching.
Step 6
Turn the bag the right way out and ease the corners out using the end of a spoon or knitting needle. Iron the entire piece and then edge stitch or hand stitch the open gap closed.
 Step 7
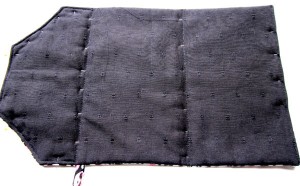
To make nice crisp folds sew through all the layers along the two seams on the outside piece of fabric. To make the flap sit more comfortably when the bag is finished, sew diagonally several times across the flap piece.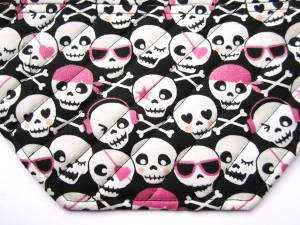
Step 8
Now fold the bottom straight edge of your bag up to meet the line of stitching at the base of the flap. Pin the edges and edge stitch to create the body of the bag. To strengthen sew backwards and forwards a few times at the top and bottom of your seams.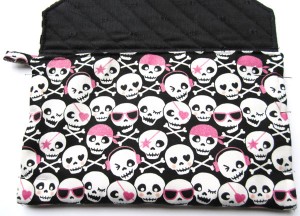
Step 9
Sew on either two large poppers or pieces of velcro to the bag and flap to keep them closed when in use.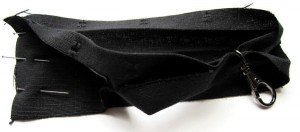 To make the wrist strap cut a piece of the lining fabric 26cm x 6cm. Fold in half lengthways and then fold the two sides into the middle and iron. Don’t sew at this point, thread through the end of the metal hangbag clip and then sew a seam across the short edge. Then sew along the long edge to close, moving the clasp around as you go. You could of course either omit the wrist strap or sew it on permanently, but I like having the option of either.
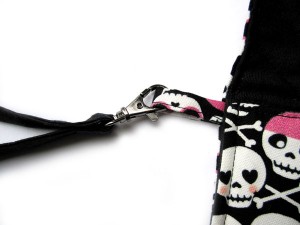 All you need to do now is take your lovely new bag out for a test drive 🙂
 Between 22-25th March, Birmingham NEC will once again play host to three wonderful creative shows.
 For those interested in ‘Make Do and Mend’ a visit to the Sewing Hub is a must. Experts are on hand to give valuable advice and practical workshops.




38 Comments (Leave a comment)