Fabulous Places Summer Food & Gift Fair!

As I’m sure you’re all aware I love attending Creative Events of all kinds. Whether they offer the chance to learn a new skill, or introduce you to artists you might otherwise have never been aware of, they are a creative person’s dream. So I am particularly excited at the moment as the upcoming Fabulous Places Summer Food & Gift Fair is fast approaching. Not only is it offering over 50 retail stalls to excite and entice, there’s also loads of children’s activities and events. Plus so many fabulous food retailers as to threaten to expand your waistband at the sheer sight of them.

But best of all…….

We’ll Be There!

Bit of shameless self promotion there (sometimes you just have to). But it really will be a fantastic event for all the family. With tickets priced at only £1 and under 16s going free, it’s the perfect day out for everyone.

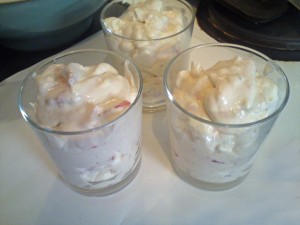
Strawberry Eton Mess Recipe!

Summer feels like it’s well and truly upon us, there’s flowers and fruit everywhere and a near constant scent of BBQs. There’s also many DIY projects getting underway as the fair conditions encourages us to improve our homes and gardens. This weekend my husband has been very busy completing various items we needed doing. So we decided we both needed a treat (him for working, me for putting up with the associated mess). The recipe I am going to share with you today is definitely a Summer treat. It was given to me by the good people at Rachel’s Organics and uses their yummy yogurt.

What You’ll Need

200g Strawberries

80g Caster sugar or Icing Sugar

4 Meringues, shop bought and crushed

300ml Double Cream, whipped

200g Rachel’s Low Fat Raspberry Bio Live Yogurt

Serves 4-6

Step 1

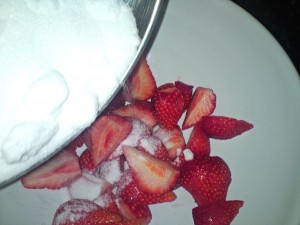
Wash and remove the stalks from the strawberries and then cut them into quarters. Place them into a large bowl and sprinkle over the sugar. With the back of a fork squash some of the strawberries to release the juices.

Step 2

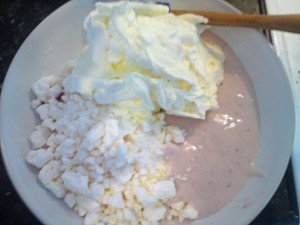
Add the crushed meringues, whipped cream and yogurt and gently fold together with a spatula.

Step 3

Spoon into serving dishes or glasses and serve immediately 🙂

Tip. Make this extra special by adding a drizzle of your favourite liquer.

Per Serving: 480kcal, Protein 3.5g, Carbs 34.9g, Fat 28.1g, Fibre 1.0g, Sugar 34.7g, Salt 0.0g.

If you enjoy this recipe, make sure to check out Rachel’s Organic online for more of their yummy recipes!

Summer Bunting Tutorial

We’ve recently been experiencing fabulous weather in the uk. The kind of weather that inspires outdoor parties, picnics and gatherings at the park. Bunting has received something of a resurgence in popularity and it always makes such a welcoming summery sight. But rather than plumping for the easily ripped paper type how about making your own fabric version! It’s remarkably simple and is a wonderful reason to use up all those fabric scraps that creative people tend to accumulate.

You’ll Need

Bias binding (length depends on how long you want your bunting)

Fabric

Carboard

Pencil or tailors chalk

Scissors

Step 1

Draw a triangle on a piece of cupboard, I used an old cereal box for this. Cut it out and ta-da you have your template! Remember to leave a border of about 1 1/2cm to be your seam allowance.

Step 2

Take all your fabric and draw around your template using either a pencil or tailors chalk. If your wondering on numbers, I think about 6 flags per 1 1/2 metres looks good. So for this length you would need 12 triangles.

Step 3

Lay your bias binding flat and space your triangles along it to make sure you’ve cut enough and to choose the order of patterns.

Step 4

Take 2 triangles and sew them together with the right side of the fabric facing. Leave the top side of your triangle free.

Step 5

Trim your seam allowance if required. If your fabric is likely to fray edge it with a zig zag stitch. Then turn the whole triangle the right way out and press with an iron.

Step 6

Repeat steps 4-5 for all your triangles. I like to sew the open edge closed, but it is not essential.

Lay your completed flags along the bias binding.

Step 7

Fold the binding in half over the top of the flags and pin or tack into position. I also press with an iron to make even easier and crisp.

Step 8

Sew along the binding making sure you catch the flag tops.

Step 9

Stand back and admire your brand new summer bunting!