 Christmas is a time for traditions both large and small. Some of these are followed en masse such as Christmas cards, but far more are personal to individual families.
In my house we have stockings before breakfast, but we do not, not under any circumstances touch any of our ‘main’ presents until after lunch. We also have a small present in the evening, my Mum used to call these Tree Presents and it really helped to spread gift giving throughout the day. In contrast to this, one of my friends has a long standing tradition of giving a gift late on Christmas Eve. To both of us these little customs seem essential to our day and Christmas just wouldn’t be the same without them.
Charles Dickens is often credited with creating Christmas as we know it today. But in his time people rarely shopped for gifts or decorated their homes far in advance. Charles’ own daughter Mary ‘Mamie’ recounted how her father would take his children every Christmas Eve to a toy shop in London, where they were allowed to select their Christmas gifts. She also mentions that the family did not give presents outside of their own home, resources not allowing for the generosity they might have wished to share otherwise.
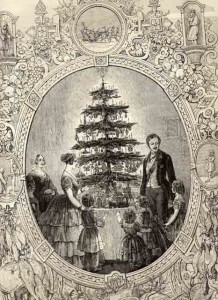 It was during the Victorian era as a whole that many of the rules of Christmas were defined. Houses had always been decorated with greenery but the Christmas Tree did not become common in British homes until the mid 1800s, after an 1848 edition of the Illustrated London News showed the Queen and her family around their tree. The Victorians also observed many customs that are rarely celebrated in the modern age, how many of us take down the Christmas tree almost immediately? This would have puzzled our ancestors exceedingly as Christmas Day is only the first day of Christmas and technically there are twelve days leading up to ‘Twelth Night’. This used to be a great period of celebration but now these days often go by unmentioned.
For many of our parents stockings meant an Orange hidden in the toe rather than the elaborate gifts which ‘Father Christmas’ seems to have been favouring of late. I myself grew up in a small country village and I mourn the loss of Christingle Walks with our neighbours, Church Bells on Christmas Eve and other signs that Christmas was nearly here.
If nothing else though the loss of past traditions does at least hold an opportunity to create some new customs. So this year that is precisely what my family and I intend to do.
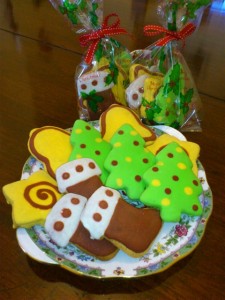
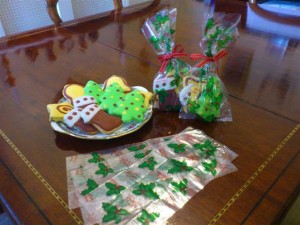 We plan on making ridiculously large quantities of Gingerbread with the kids. These will be decorated by hand with a fabulous biscuit icing which sets hard. Then placed into gift bags and given out to friends and neighbours.
Gingerbread works particularly well for this project, but any other roll out style of biscuit works too. If you’d like to give them a go the icing recipe is below.
What are some of your favourite Christmas traditions?
Biscuit Icing
10 oz/ 280g Icing Sugar
2Tbsp = 3Tsp Dried Egg White Powder
4 Tbsp Cool water
Mix the icing sugar, egg white powder and water together until smooth.
Colour small quantities to ice your biscuits. The icing will set hard over several hours (we leave ours overnight).
 My boys have been fans of the Hot Wheels Wall Track range for quite sometime now, so when we were offered the opportunity of reviewing the latest addition we were more than happy to agree. The new track is called the Power Tower and promises new thrills to add to an existing wall track or if you’re just starting your collection.
 To say the boys (and my daughter too) love this track would be an understatement, it can keep them occupied (and blissfully quiet) for a long time. Cars whirl around in the lift(elevator) style toy before zooming down the track, hoping not to get caught in the chomping head further down.
 Would I recommend this product?








Comments Off on Hot Wheels Wall Track Power Tower Review